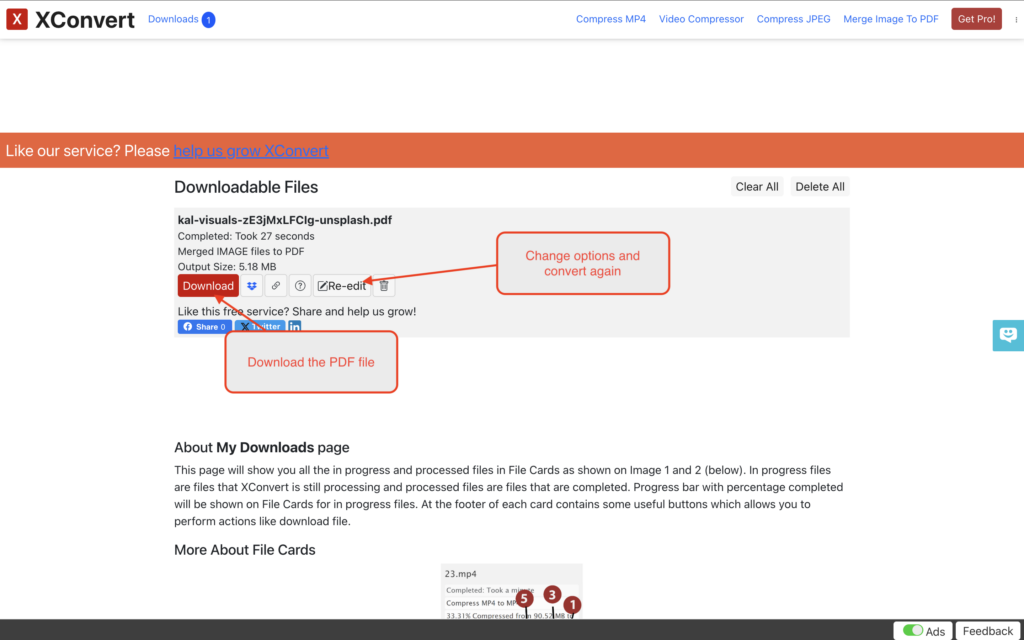
In this tutorial, we will walk though how you can use the XConvert JPG to PDF to convert your images to PDF documents.
Step 1: Navigate to the JPG to PDF converter
On your favourite browser, navigate to https://www.xconvert.com/convert-jpg-to-pdf

Step 2: Select JPG images
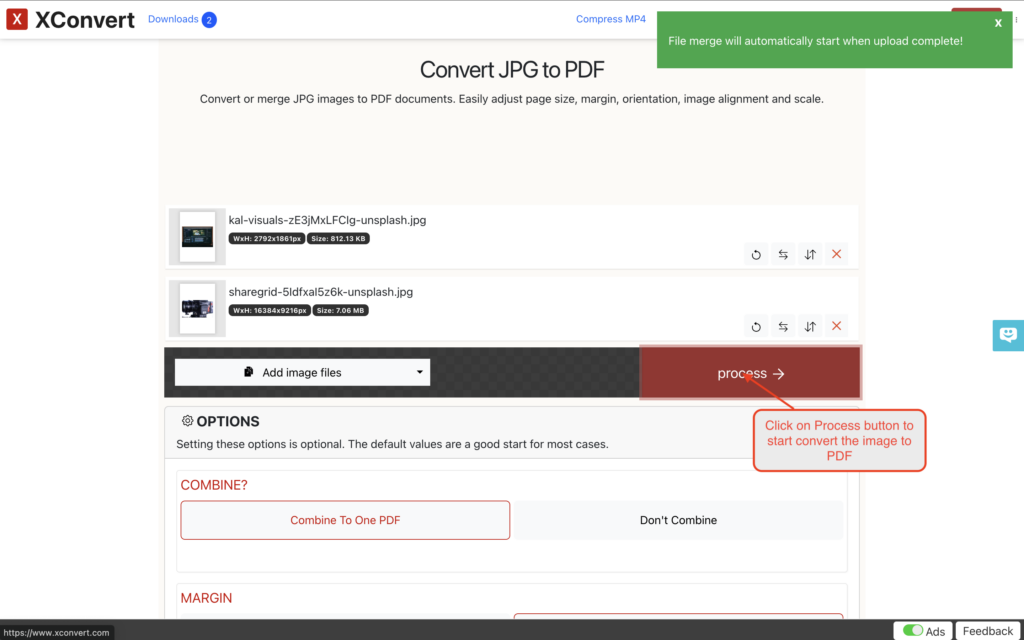
Tap on Add image files button to select JPG images from file select dialog.

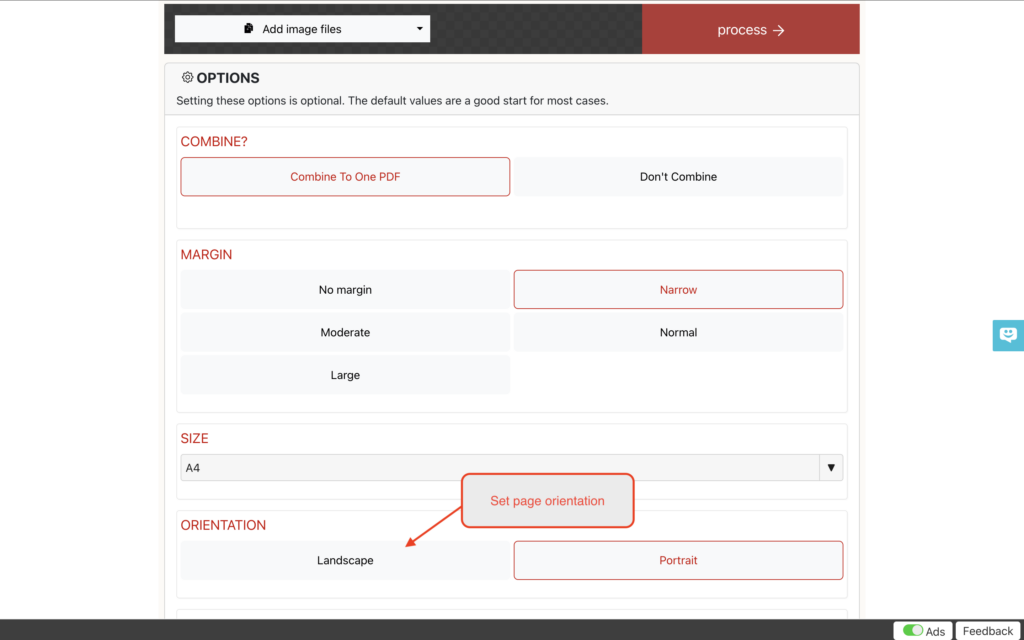
Step 3: Choose to combine option
Combine option will let you combined all images to a single PDF document or create a separate PDF for each image.
- Combine to One PDF option will combine all the images to a single PDF document. Order of the pages will be decided by their position on the uploaded file section. You can drag and drop uploaded files cards to re-arrange the pages.
- Don’t Combine option will create an PDF file for each uploaded image file

Step 4: Set PDF document margin
There are 4 option to set the margin
- No margin
- Narrow – 0.25 inches
- Moderate – 0.5 inches
- Normal – 1 inch
- Large 1.25 inch

Step 5: Set page size
Depend on what is the document used for, you can set the page size. By default, we set the page size to the most common A4 size. There are other options such as Legal and Letter size are available from the SIZE dropdown. You can choose the Original option to keep the PDF page same size as your image. When the Original option is selected, options such as margin and orientation will be ignored since they don’t really make sense.

Step 6: Set page orientation
Page orientation option, let you set the page to Landscape or Portrait. Most commonly, letters and documents usually use portrait orientation while photos or certificate uses Landscape option.
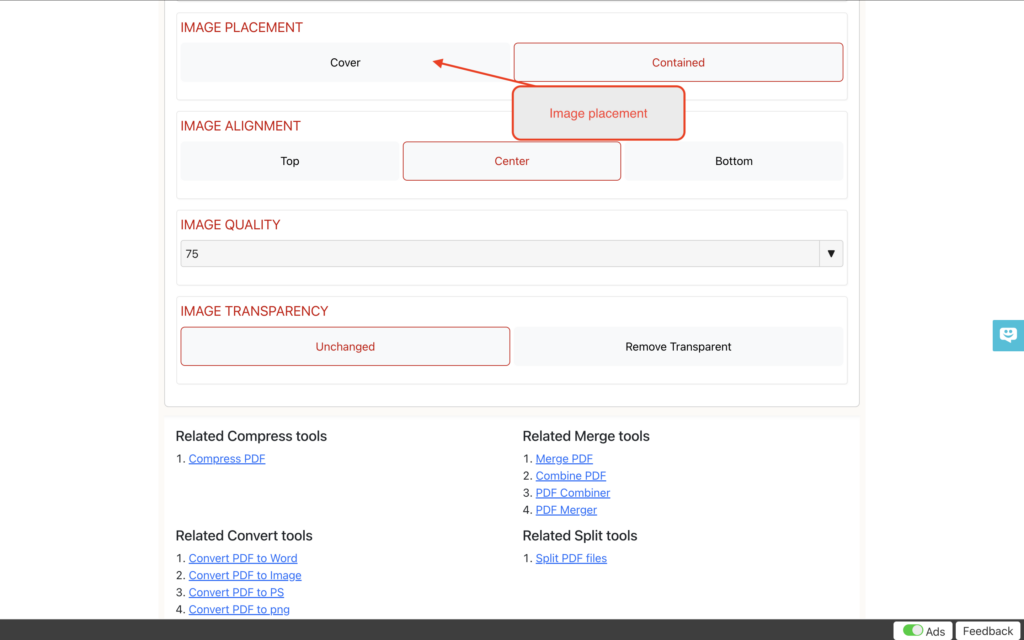
Step 7: Set image placement
Until now you changed the page layout, now it’s time to place the image in the document. There are two options to place the image on the PDF document:
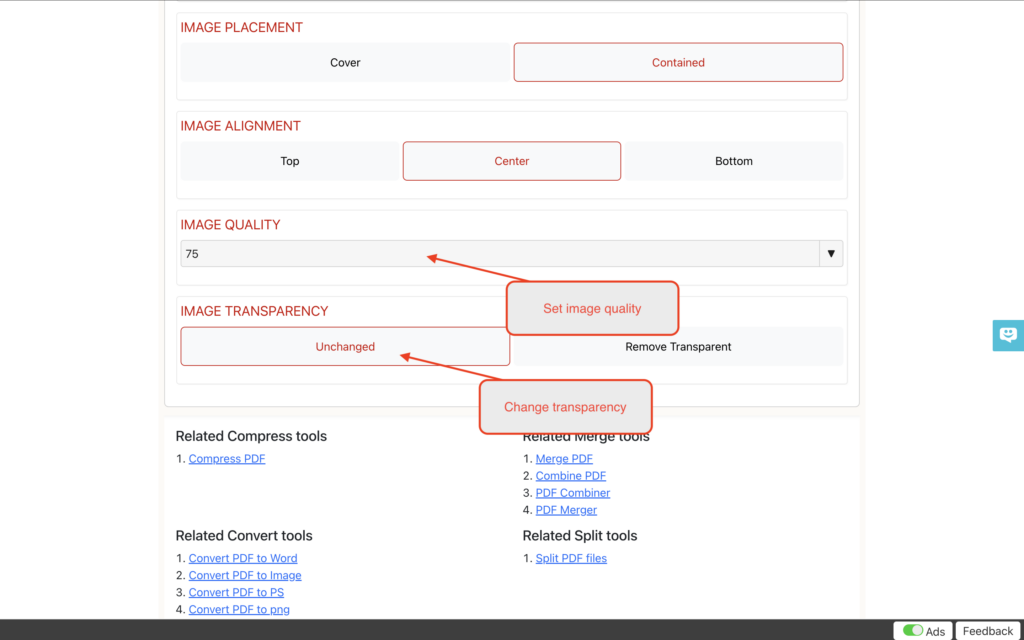
- Cover option will expand the image while keeping the aspect ratio until the image fills the entire area of the document’s visible area
- Contained option will fit the image with in the document so that entire image will be visible area
visible area is referred to the part of the document that is within the margin that you set on Step 3.
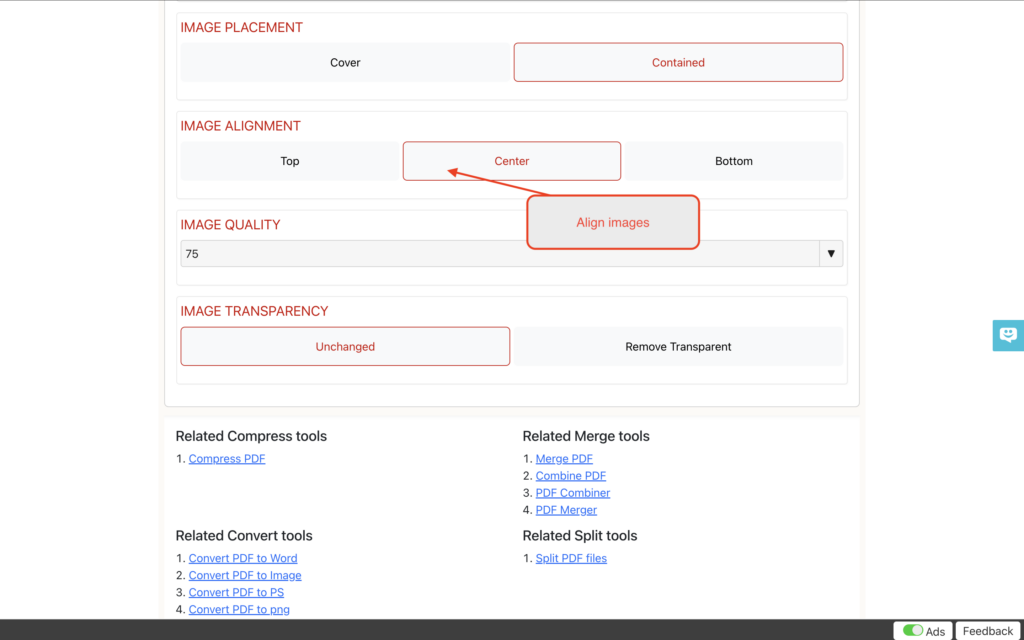
Step 8: Align images
This allows you to align an image with in the visible area of the document. This comes handy if your image is small and you want to align then at the top of the page instead of a center of the page.
- Top option will pull the image to the top of the page
- Center option will place the image at the center of the page
- Bottom option will push the image to the bottom of the page
Note: if you have your image placement set as cover, this option has no effect since your image is taking up all the available space on the document.
Step 9: Set image quality and transparency
Image quality option lets you reduce PDF document size while image transparency option will keep the transparent images as transparent instead of forcing them to have a white background.
Quality 75 will have no visible image deterioration, but the output PDF document size will be drastically small.
Step 10: Convert images
Now that you have all your options set, it’s time to kick start the conversion process by tapping on the process button.
Step 11: Download PDF document
Once XConvert complete the JPG to PDF conversion, you can click on the Download button get your PDF document. If you want to change some options and try again, you can tap on the Re-edit button to change up the options and try again.
